My favourite DIY ever is a good makeover. Taking something old and discarded, giving it a fresh lick of paint and giving it a new life (and for a fraction of the cost of buying new, bonus!) is really fun and rewarding. This DIY Chalkboard Makeover is so super easy, anyone can give it a go!
This makeover is from a few years ago (mid-2010) when I was just starting out selling at local markets, and was originally posted on my personal blog.
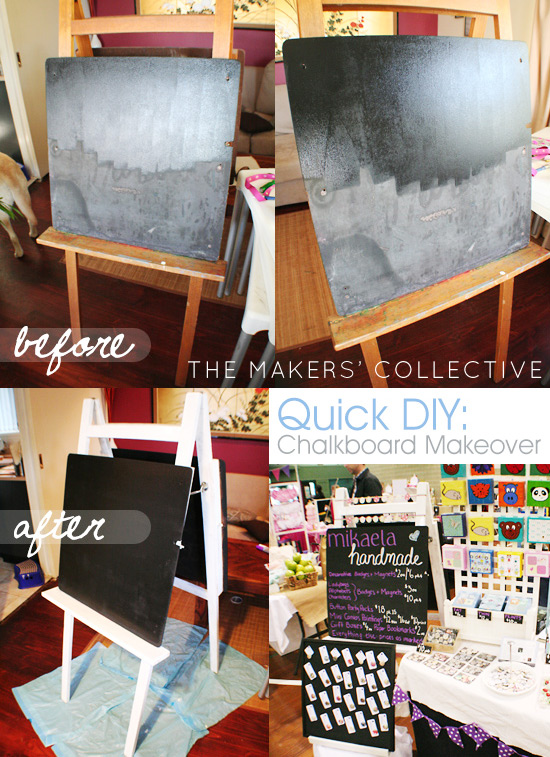
I picked up this old easel/chalkboard at The Green Shed (formally Aussie Junk) in Mitchell along with a few other trays and things for a whopping $15. There were some masonite boards screwed to the front and back, and I was planning to use it as a stand for my market signage. But beneath them were chalkboards, so I decided to give it a little makeover and use the chalkboards to write my prices on for markets!
All it needed was a couple of coats of white glossy enamel on the frame, and 2 coats of chalkboard paint (my first adventure with this stuff) on the drawing space. I alwmost forgot to take a “before” photo:

As it turns out, it’s a bit of a heavy mofo so I didn’t end up using it for very many markets, as at the time I didn’t have a flatbed trolley to cart stuff around (I HIGHLY recommend getting a small flatbed trolley if you are going to be selling at markets, you can wheel in 4 plastic tub containers at a time instead of trying to carry one heavy one at a time, it will save you LOADS of time and back-ache).
We still have the chalkboard though and Rafa is just about tall enough to start using it, so I might give it another lick of chalkboard paint soon to freshen it up (it’s been out in the weather) and bring it back inside again =)
